If you’re an ambitious entrepreneur or business owner, you want your marketing strategies to flow through each stage. Optimizing the entire process will make it easier to communicate with customers. Basically, you want to be efficient. ClickFunnels offers this by allowing users to create tags for multiple functions.
You can create tags in ClickFunnels by using email integration, automation, Follow-Up Funnels, or your existing contacts. Moreover, ClickFunnels gives business owners the option to create tags for their buyers, email lists, and other functions by using the platform’s internal features.
Creating these convenient tags is also a simple and easy process. Keep reading to follow along with the step-by-step guide for adding tags on ClickFunnels. These will help you organize everything and segment your audience.
Creating Tags for Contacts
You can filter your contacts based on the tags you assign to them.
These tags will allow you to collectively carry out functions like email automation and reviewing data for certain contact groups.
There are different ways to create tags for your contacts.
1. Email integration
Integrating your autoresponder with contact tags will help you send tailored alerts and messages to the right group of customers.
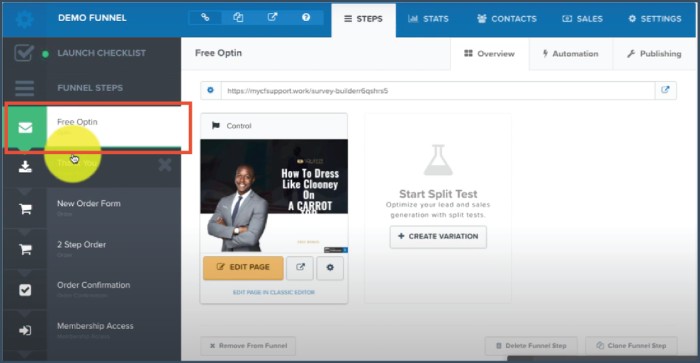
For this method, head on over to your funnel and choose the stage of the funnel where you want to add a tag.
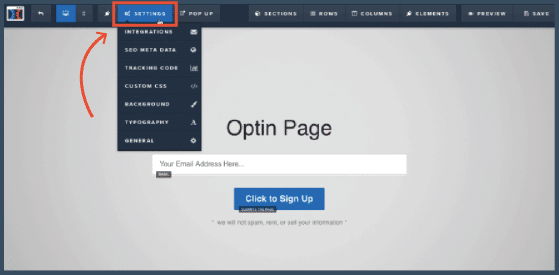
Click the Edit Page option for your landing page and then go through the Settings tab. As you scroll through this menu, select Integrations.
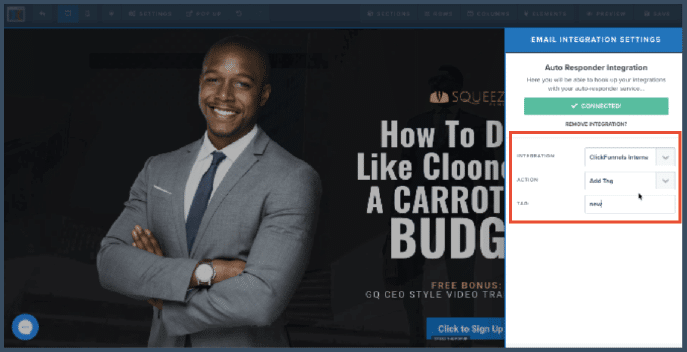
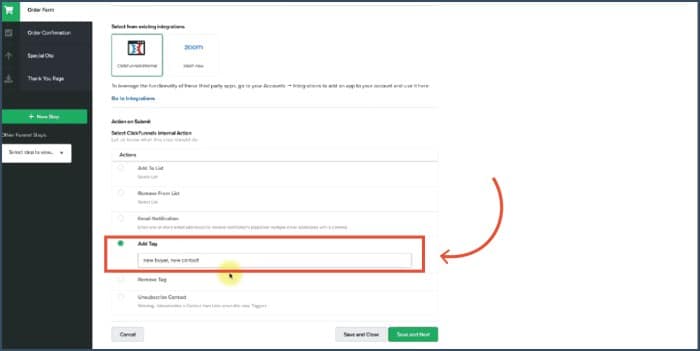
A panel will slide over your screen from the right side. Choose your integration from the dropdown menu and select ClickFunnels Internal.
Choose the action right below it as Add Tag, and then proceed to type in a tag.
Use a comma between words/phrases if you want to add multiple tags. Once you’re done, you can save the changes at the top right corner of the page.

When potential customers from your contact list reach the specific stage of the funnel that you selected, they will receive an automated email.
Tags group these contacts and send messages at the appropriate times.
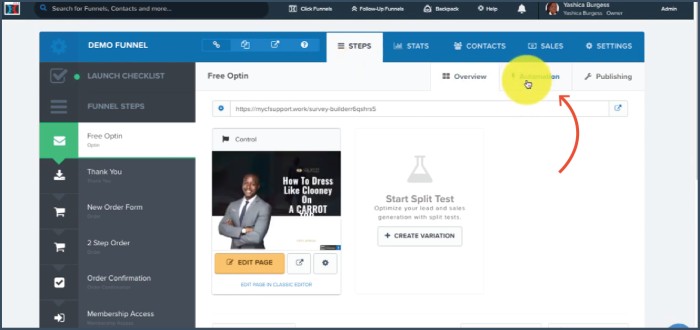
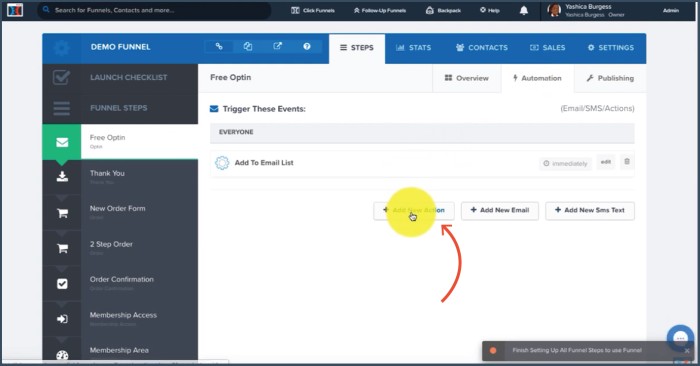
2. Automation
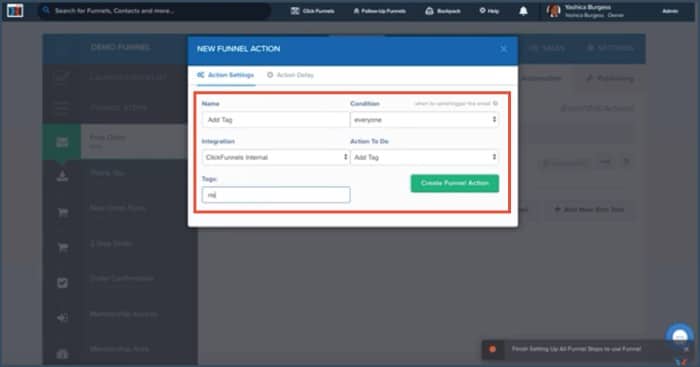
There will be an Automation tab within your funnel. Choose that to Add New Action. The new window that will pop up will have fields to type in Add tag.
For the Name of the action, choose the Condition and select Integration as ClickFunnels Internal.
Then you can pick out the Action To Do from the dropdown menu as Add Tag. You can then name your tag after that and click Create Funnel Action.
By choosing this method of tagging your contacts, you can quickly sort your visitors.
Your customers will be automatically tagged when they visit a certain part of your funnel.
3. Follow-Up Funnels
You can only use this method if you have subscribed to the Platinum plan of ClickFunnels.
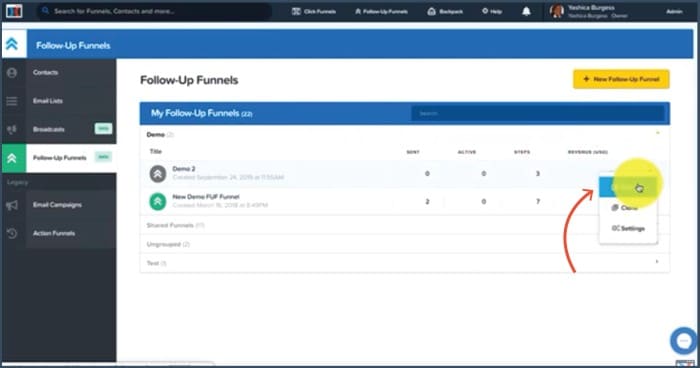
If you have the Platinum account, you can either make a new Follow-Up Funnel or make changes to an existing one.
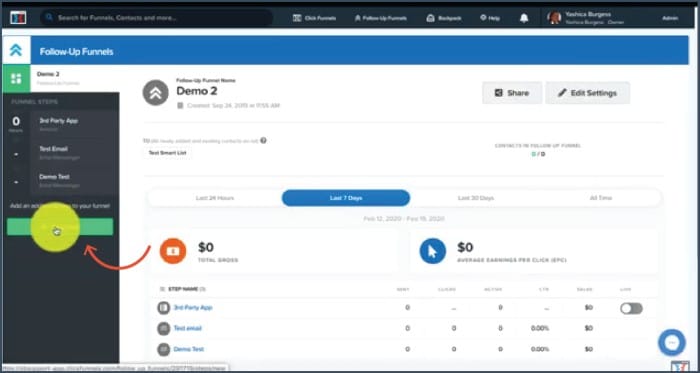
For an existing funnel, click the Edit option from the menu beside your selected Follow-Up Funnel. The left side of your screen will let you Add New Step.
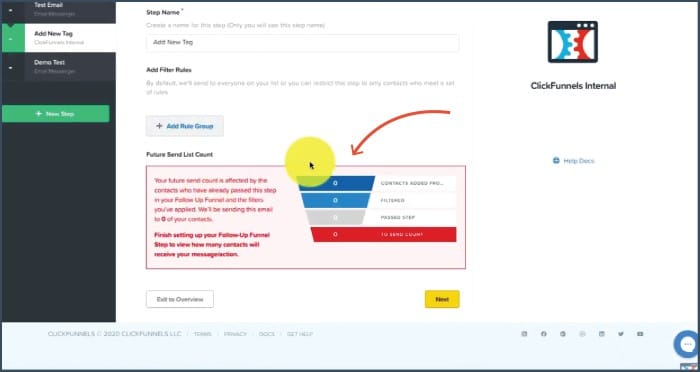
Name the step by typing it out in the field. Then select ClickFunnels Internal. This will take you to another page where you can Add Filters Rules for your tags.
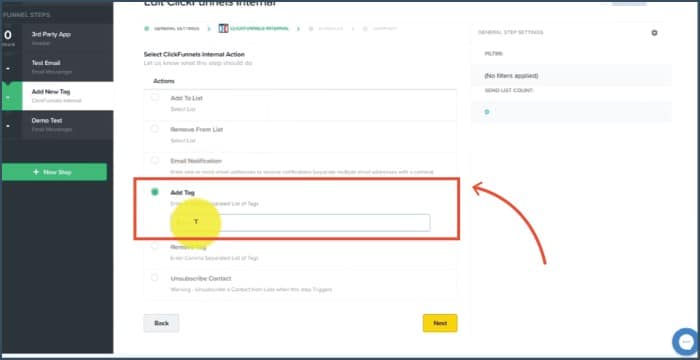
Make your way to the bottom of the page and click Next. On this new page, select the action as Add tag and type in the tag name.
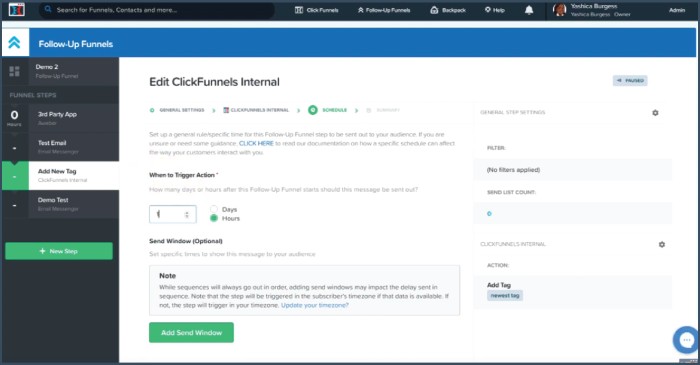
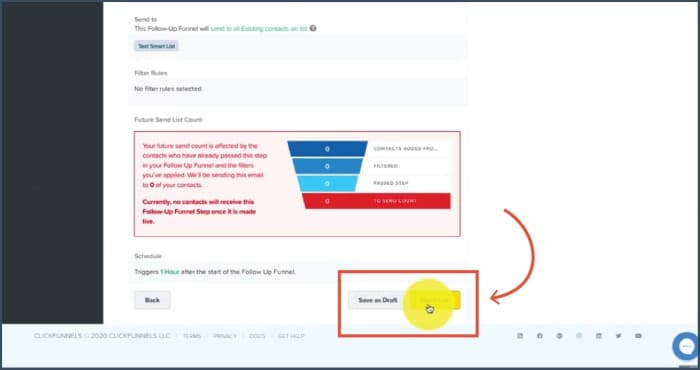
Moving on to the Next page, choose the timing of the trigger response for the tag after the launch of the Follow-Up Funnel.
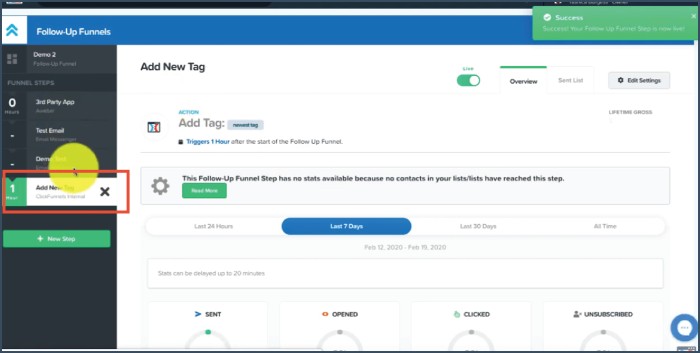
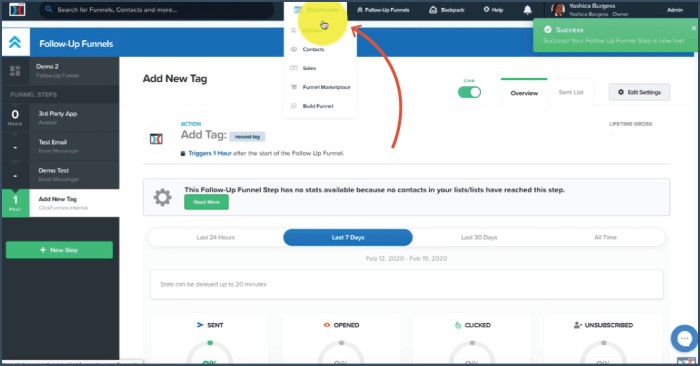
Review your changes and then select Make Live to launch these steps. By using this method, adding your tag has become a stage within your Follow-Up Funnel.
When customers make certain choices in your funnel, the responses will be automatically triggered.
The customer will receive messages based on the times you have selected.

4. Existing Contacts
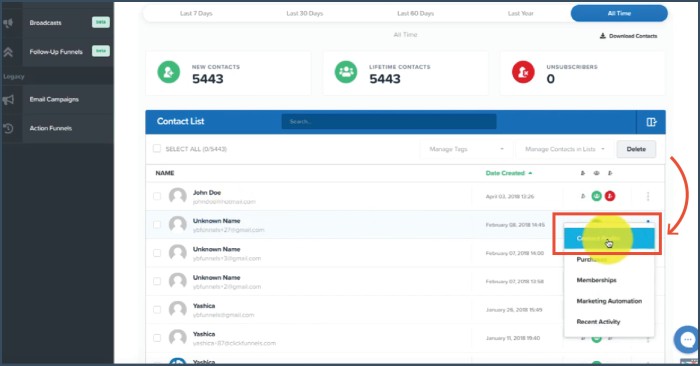
Click on Contacts from the ClickFunnels menu or your Follow-Up Funnels (if you have it). This will lead you to your entire contact list.
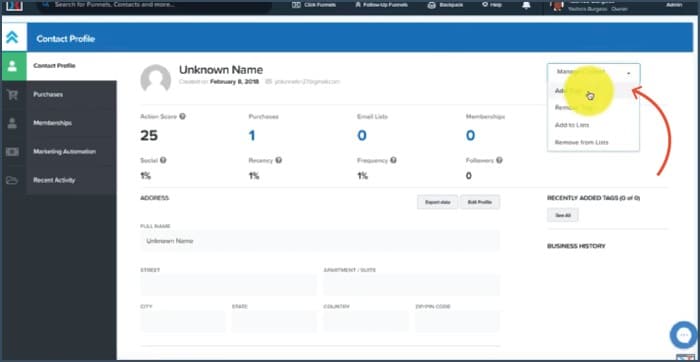
For individual contacts, you can select the name or choose the dropdown menu on the right to choose Contact Profile.
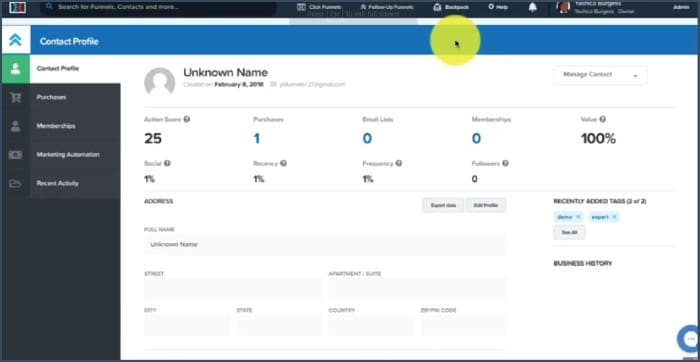
Click Add Tags from the Manage Profile menu. You can then add a new tag or select from the existing ones.
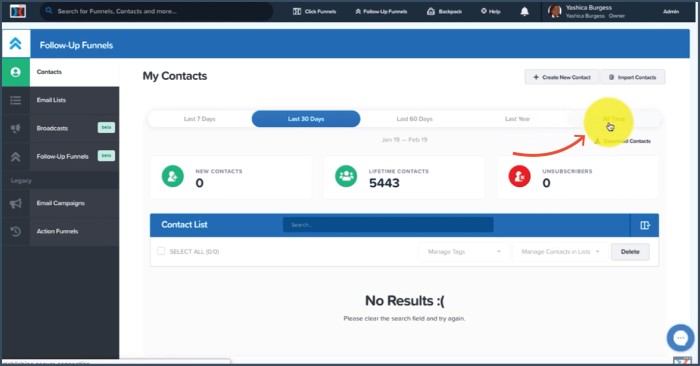

In case you want to add a tag to multiple contacts at once, you’ll need the Mass Actions feature, which is only available on Platinum ClickFunnels accounts.
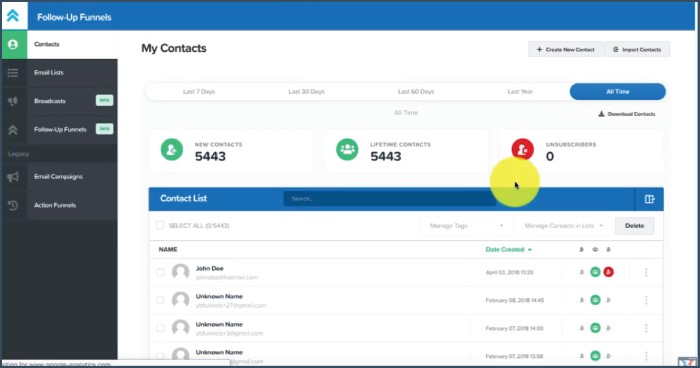
If you have access to it, go to your Contacts and open up the entire list by choosing All Time.
You can select either all of your contacts or a selected group of them. After selection, use the Manage Tags dropdown menu and click on Add tag.
This will lead you to a new page where you can type out a new tag or select from previous tags.
The tags are applied to the contacts automatically when the rest of the actions on the ClickFunnels account have been carried out.
Creating Tags for Buyers
Buyers can also be tagged so you can organize your contacts. This tag shows which customers have made purchases through the designed landing pages.
For this type of tagging, make sure you already have a product that you are selling.
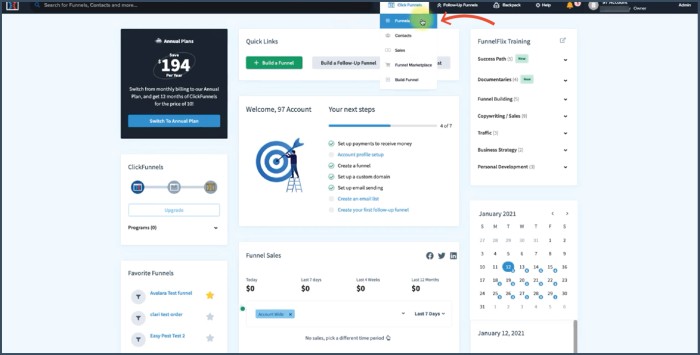
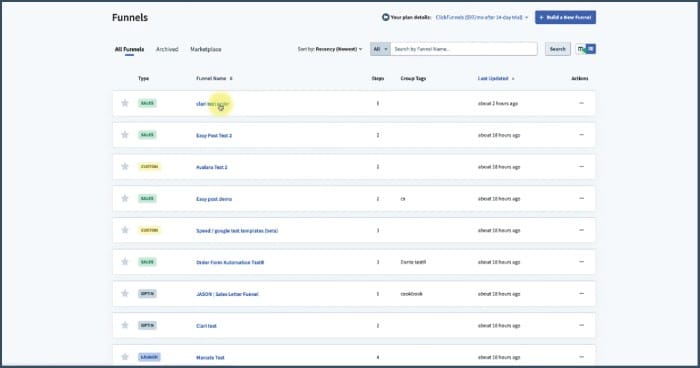
You also need a funnel, an order form page, and, most importantly, a Platinum ClickFunnels account. Go to Funnels from the ClickFunnels tab at the top of your page.
Select the funnel of your choice by using the search bar or going through the list of funnels.
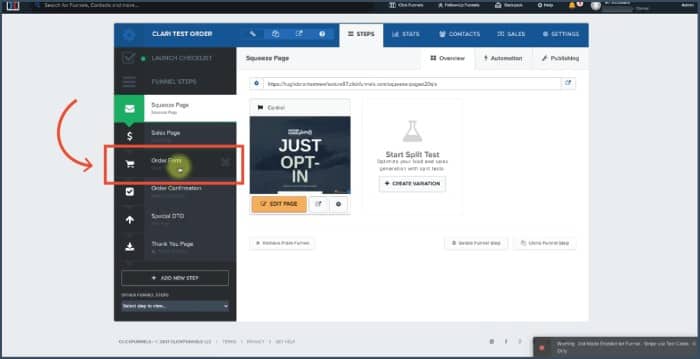
After choosing the right funnel, either select the Order Form or Upsell/ Downsell page.
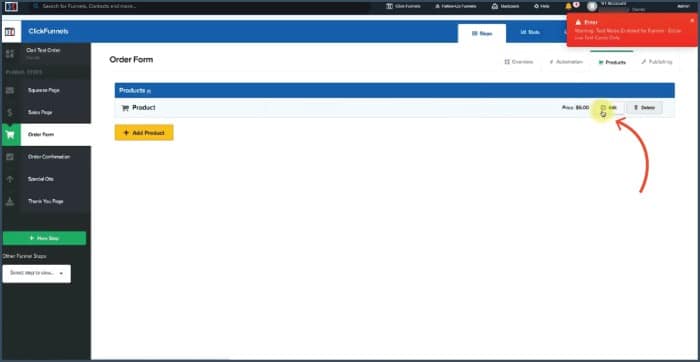
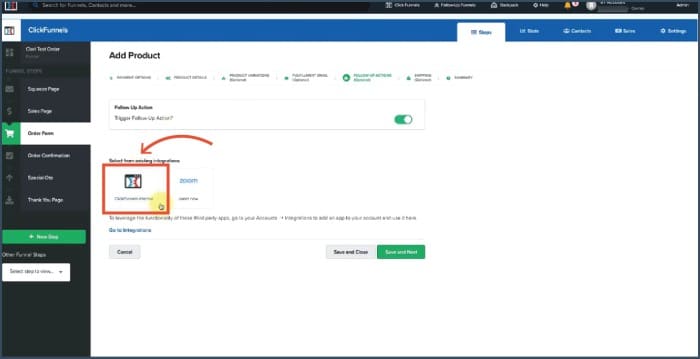
Then move to the Products tab, which will show you a list of products that you can Edit. Go to the Follow-Up Actions, and turn on the Trigger Follow-Up Action.
ClickFunnels Internal will be your integration. Choose Add Tag from the list of Actions.
At this point, you can type out one or more tags, provided there is a comma between each tag. All you need to do now is save your changes.
Other Types of Tags
1. Making Tags for Funnels
You can tag a funnel as you are creating it and make tags for existing funnels within your dashboard.
When you’re building a funnel, simply type out a tag in the field Select Group Tag.
For your existing funnel, head over to the Settings tab for the funnel and type the name of the tag in Group Tag.
2. Creating Tags for Follow-Up Funnels
Similarly, if you have a Platinum ClickFunnels, assign a Group Tag to a new Follow-Up Funnel or an existing one through Settings.
3. Tagging Email Lists
For your convenience, tags sort emails into groups. When creating a new email list, assign a Group Tag to it from the field or select a tag for the email list from the settings.
4. Creating Tags for Broadcasts
You can assign a group tag to a broadcast while you’re creating a new one. Of course, you can also do this for existing broadcasts. Just create the tags in the Settings.
Final Thoughts
You can optimize and organize your marketing strategies on ClickFunnels by using tags for all sorts of functions.
There are also multiple ways to add, edit and remove these tags. Tags make it easier to segment your audience and deliver targeted messages at the correct times.
Tags can also help you organize and sort your funnels. Overall, tags increase integration for businesses and make their marketing roadmap clearer.